
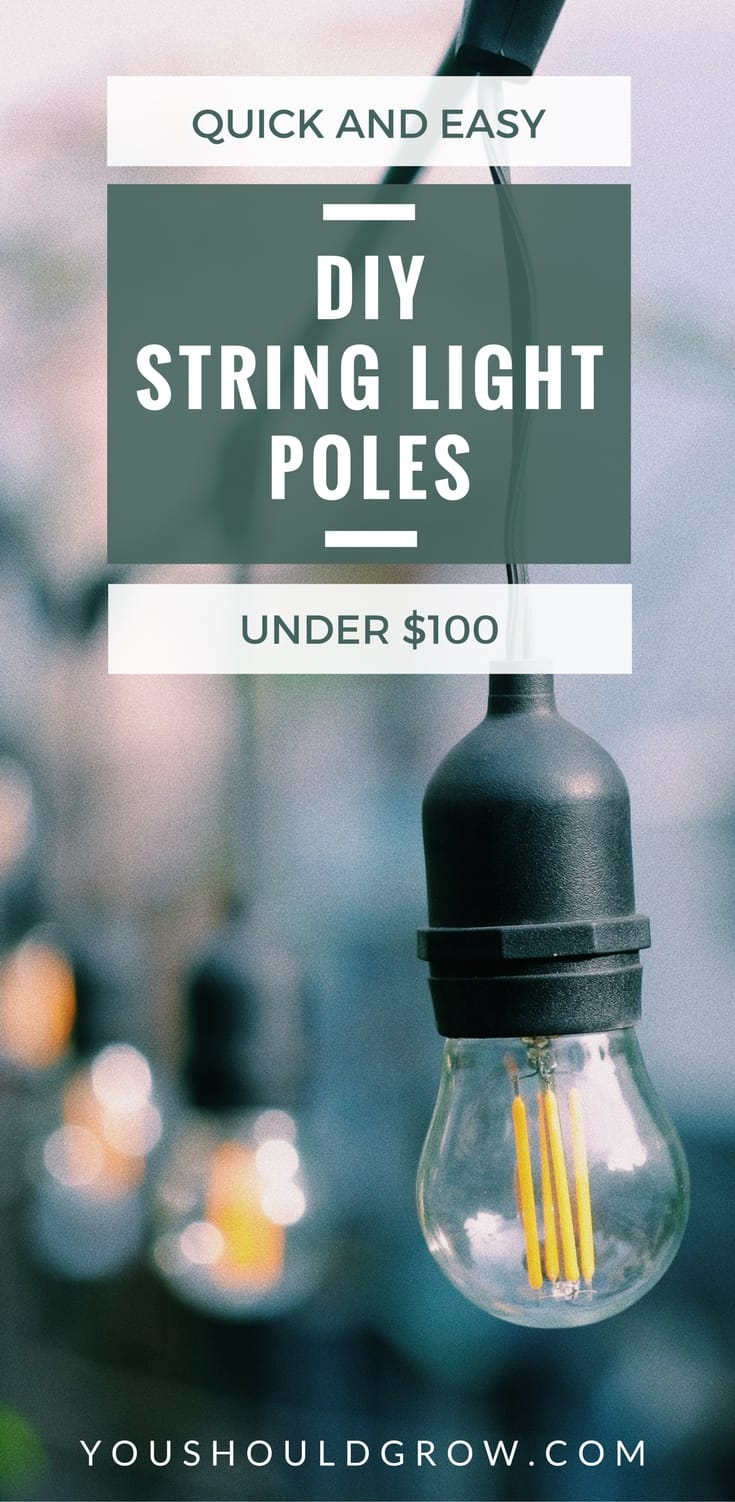
Mobile String Light Poles Easy DIY
As an Amazon Associate and member of other affiliate programs, I earn from qualifying purchases.
These mobile string light poles are the perfect easy DIY for spring.
They can really be used anywhere. They would be great on a patio or around the pool, but, at the farm, I love using them to light up outdoor living spaces under the trees and around the garden.
I came up with this idea because I desperately needed a solution for lighting around the barn when it gets dark. My dilemma was setting up a lighting system that would be easy to move when we needed to get the tractor through and wasn’t expensive or difficult to do.
So I decided to make my own mobile light poles from inexpensive products I bought at the home improvement store. And it turned out to be a pretty awesome easy DIY project.
**Update: These mobile string light poles have been outdoors on our farm for over a year and still work great!
Shopping List
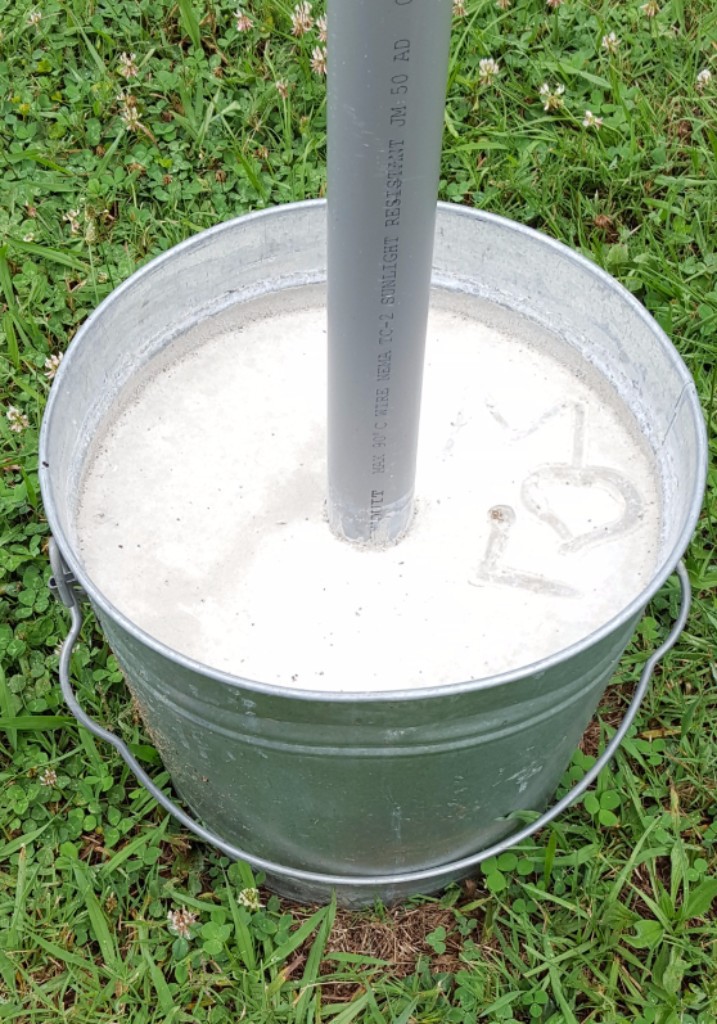
- 6 gallon galvanized buckets 2 @ $15 each
- Quikrete 2 @ $3 per 60# bag
- 2″ diameter 10-foot long gray electrical conduit tubes 2 @ $7 each
- PVC caps 2 @ $2 each
- paint to match conduit tubes if needed (updated)
I showed my husband what I bought and told him what I wanted him to do. Then I stepped back to watch him make it all happen.
He was worried that it would be difficult to keep the conduit level vertically, but it turned out that the Quikrete is so thick and quick that it was easy to keep the conduit in place. Even on a windy day.
Assembly (Requires 2 people)
- Find a level area to assemble the light poles
- Fill bucket 3/4 full with water
- Stand conduit on end and hold in place
- Pour bag of Quikrete into bucket and stir with a stick – Don’t move the conduit
- It should set up enough to let go of the conduit within a couple minutes
- Leave it on level ground for 48 hours
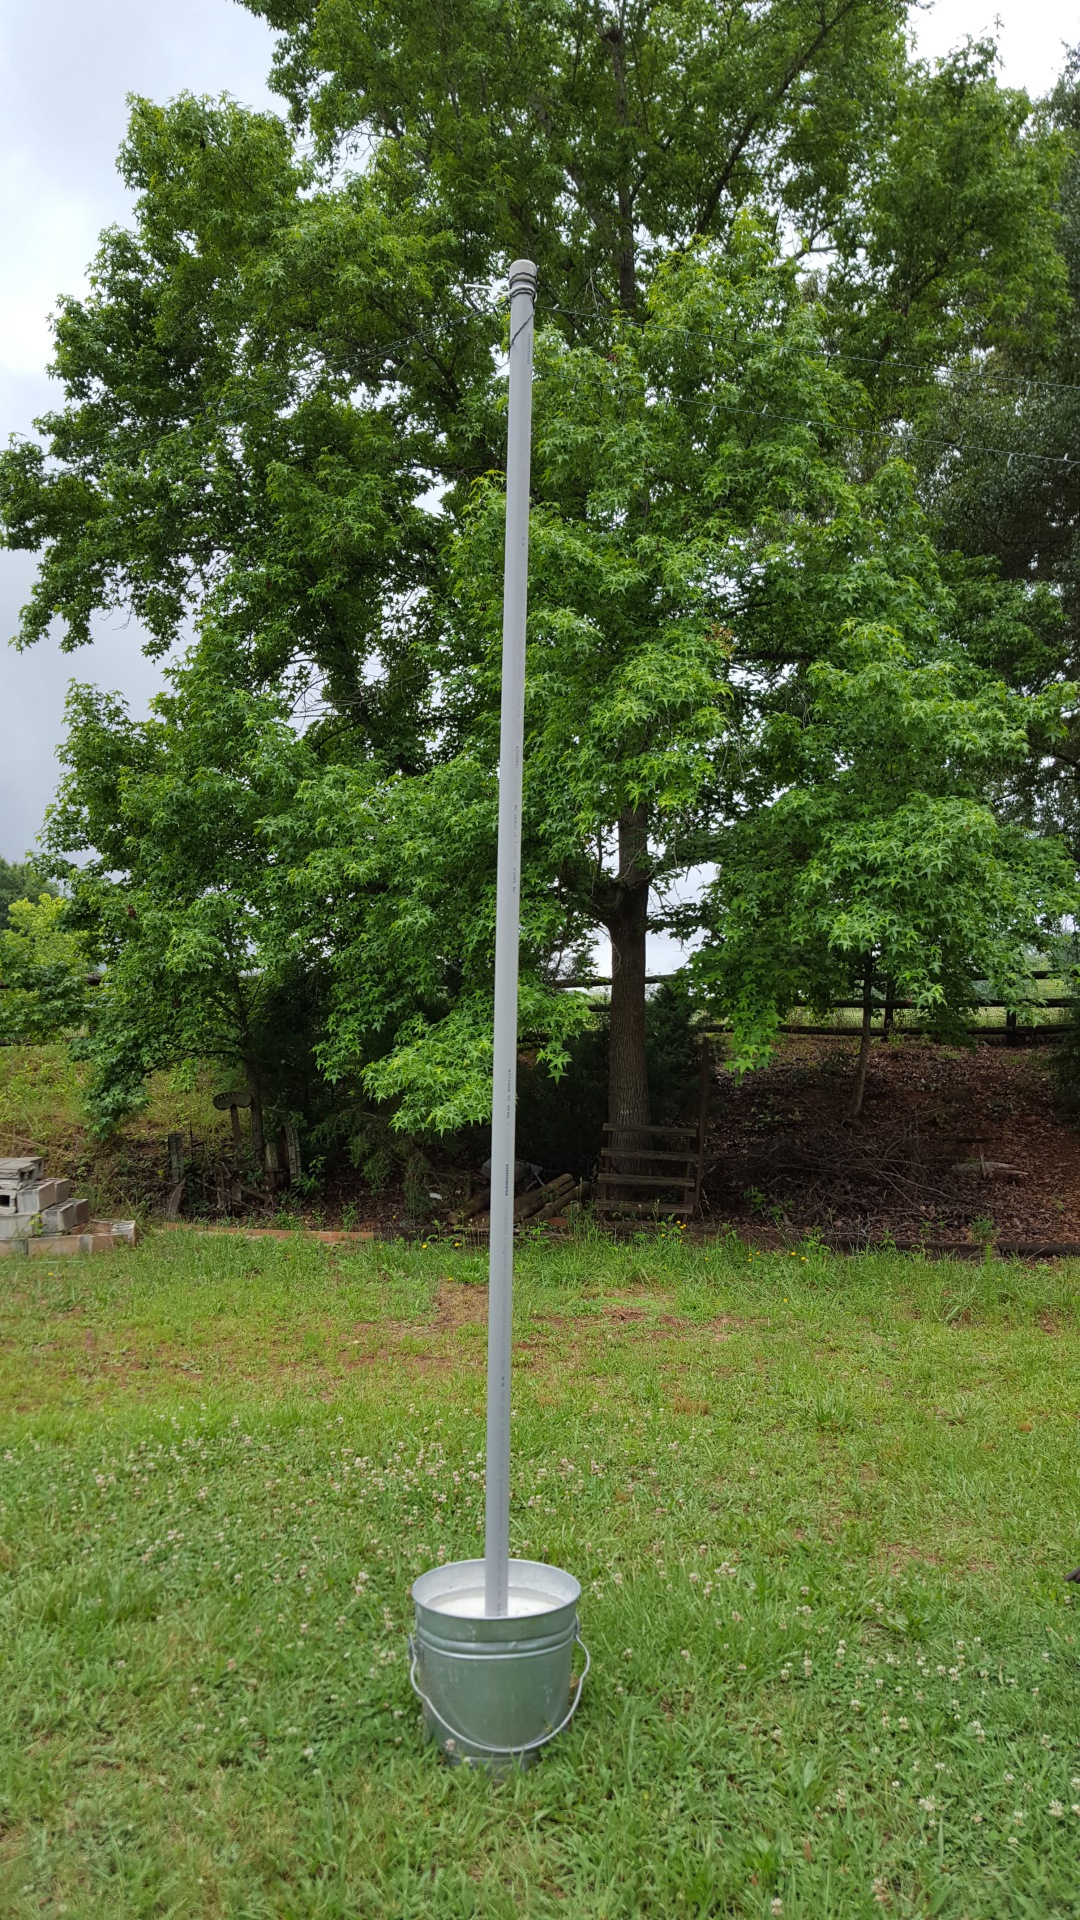
- Once the Quikrete is set up, lay the pole over on its side to place the PVC cap over the open end at the top. This will prevent rain water from filling your PVC pipe. I did have to paint my PVC caps with gray paint to make them match. I already had some, but a can of gray spray paint is all you would need.
It was that easy and cost around $50 for the whole project. Two days later we poured off the excess water and marked our initials in the top.
You can see the conduit had printing on it which doesn’t bother me. It’s a detail I am willing to overlook because I am a lazy DIYer, and the gray color fits in naturally at our farm.
Results
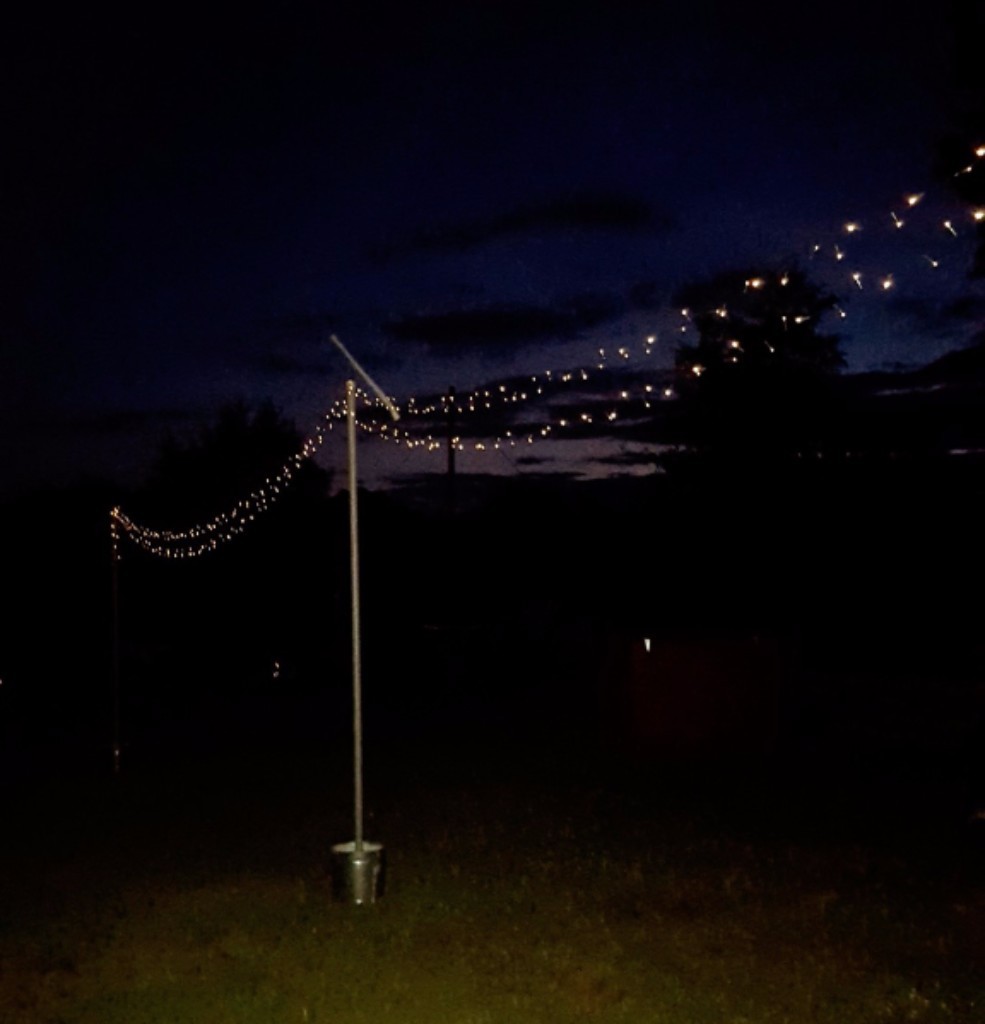
These string light poles were so easy and turned out looking great. The best thing is that they are mobile, and we can use it anywhere on the farm with these great solar lights. It’s not like they lit up the farm, but they allowed for ambient lighting outside for guests to gather.
We hung the lights by wrapping them and using zip ties. We always have a set of zip ties around the farm.
They can be dressed up with more lights, plants or even fabric for fancy parties and left as is for more a casual get-together.
Not all of my DIY ideas turn out to be so super easy, but this one worked out great and gives pretty instant satisfaction. And who doesn’t like that?!
Do you think you can use some mobile string light poles in your yard? Of course, you can. 🙂


This is fantastic! We have a teeny tiny yard. I’ve been trying to figure out how to get some sort of post in the corner in order to string lights. I’m going to show my hubbs your project! I think this is our solution! I see many summer nights out on the front patio, thanks to you!
Yay! I’m so glad! Ours are still working great, so I know you will love them! Thanks for reading. 🙂
Hey there, where do you purchase the poles from
I purchased the poles at our local Home Depot.
Most states ban electric over pools. Perhaps removing that would be advisable. We have similar lighting over our patio and we love it.
Definitely be careful with electricity and water! Good advice.
Can you give a little more detail on how you used the zip ties to attach the lights at the top?
thanks
Hey, George! We just wrapped the zip ties around the lights and the pole and pulled tightly. When the tornado/storm came through a couple of weeks ago, a branch flew through and broke the strands of lights right in the middle. Despite that, they were still attached to the poles. You gotta love zip ties!!
Do you think that we can use plastic buckets instead of galvanized buckets?
I think that you could use them, but in my experience, the plastic buckets eventually crumble apart when left outside.
I’ve read some comments about the lights lasting for 45 minutes to an hour. What has your experience been with the lasting of the lights?
The lights I used stayed on all night. Here’s a link to the exact lights I purchased. http://amzn.to/2qDfqNc
I like your idea and I modified ours by using 3/4 quarry rock and EMT (electric metallic tubing). We needed 20 poles for a wedding event and I had access to 5 gallon buckets. You and I like zip ties, but plastic buckets have a special place in my DIY heart.
After the wedding we recovered the conduit for future use, used the rock to fill a few pot holes in the roads between the cattle pens and got all my buckets back. I realize we will have to do it all again next wedding. We used LED lights that provided the right illumination.
How much Quarry rock did you purchase? I am needing to do this for a wedding also. So trying to figure out how much I need
Sounds great! Do you know around how much each one of these buckets weighs?
Ha! A lot! We used 60 pound bags of Quickrete so a little more than that. They are heavy!
How are they at keeping upright in windy condition? I have a firepit that is a beach theme and we want to use the pails to hold our bamboo poles and lights. I dont want to take them down 😊
I leave mine in place all the time.They have only fallen over once. A tornado came through nearby and the winds blew off some branches that flew into the string lights. The lights broke, but the poles were fine once I righted them. The pipe I used is very lightweight, so the base has held it up very well. If your poles are heavy, consider getting a bigger bucket and more concrete. Love your idea! I bet it turns out really cute!
Hi – We love your idea! Sorry to be remedial…but how do the lights and zip ties not just slide down the pole?
Hi, Ashley! We just pull them tight as we can and that seemed to be enough. If you wanted you could drill a couple of holes into the top of the pole and slide the lights through or screw in an eye hook and zip tie to that. 🙂
Hi Laura!
How far apart would you say you placed the poles?
I’m planning my wedding and I want to make sure I make enough poles 🙂
Hey, Kim! I set ours about 20 feet from each other. Congratulations on your wedding!
Thank you for the diy! Do you know how much each bucket weighs? I am a party planner and would like to be able to lug these babies all over the place 🙂
The buckets are pretty heavy with the bags of Quikrete in them. I would say they are at least 50 pounds. 🙂
What is the dimension of the buckets you used?
Hi, Harmony! I guess the buckets are about 15 inches (38cm) wide and 20 inches (50cm) tall.
Hey – love your blog and this post! Do you have trouble w these buckets filling up w water on top of the concrete when it rains? Is that a problem?
Hi, Ashley! Thanks so much! Yes, the water does fill up the top few inches, but we just tilt them over to dump it out. It hasn’t been a huge issue for us. 🙂
Drill a couple of holes around the bucket, level with the top of the concrete, the water will drain out then.
Good idea!
Do you know how much weight these poles can hold when spread apart?
I wanted to use this to hang bistro lights at my wedding around a 16′ x 24′ area. I see that your lights were 72′. How many poles did you need to string this length?
Thanks!
That’s a great question! I honestly don’t know much weight they would hold, but my solar lights are very lightweight. I used 2 poles and the barn to hang our lights. Congratulations on your wedding!
We recently did string lights for our wedding as well but we used wooden poles. I really like this idea as you can have it all throughout your backyard! Congrats on getting married!
Megan
Hi! This is brilliant! I love how simple you made it. I’m looking to possibly DIY my own lighting and stands for my upcoming wedding. How long is the strand of lights between each pair of poles? My big concern is that the weight of the strand of market lights might pull the stand over and come toppling down on our unsuspecting loved ones. From your experience does it seem like the base can really keep the pole from leaning due to the weight of the lights? Thank you so much! Those rental companies are SO expensive.
Hi, Ker! I have not tried them with market lights, but they held up exceptionally well for the smaller lights. If I were using these with market lights, I would look in the lumber department for something more sturdy than the PVC pipe. The base is very heavy, and ours only fell over once when a storm came through and blew a branch into the string of lights. Congratulations on your wedding!!
Hi, do you filling the pvc pipe with sand will help with them tilting over for heavier lights?
We didn’t, but you could give that a try!
Hi Laura,
Thanks so much for this great D.I.Y.! I’ve been needing something like this for a long time! I have no trees around my patio! I would also like to make a set of four for a small canopy. Years ago on a tv show a gal did something similar and some how made a more pointy top for the poles. Then she used fabric with grommets in the four corners, slipped them over the pointy tips and made a temporary shade cover for her patio. This wasn’t left outside all the time because of rain possibly gathering the middle. But easy enough to just tip the pole, slide on the grommets, and she had a pretty shade cover for her table and chairs! I think she used pretty floral sheets from the thrift store. It was so pretty and functional!
Thanks Again!
Hi, Becky! That’s a really cool idea! Thanks for sharing! 🙂
Hi! I love this and I’m defiantly doing it! I was wondering if these buckets are going to rust?
Ours have not rusted yet. 🙂
Where did you purchase you’re quickrete? I tried the home depot near me, but they only have 10lb. buckets for about $7. I want to make atleast 4 of these, so I’d love to find the 60lbs. bag.
We found ours at our local Home Depot, but I would guess other hardware stores also carry it.
Great work! I am impressed with your work and I want to give this a try. Thanks and keep sharing.
Thanks, Amanda!
This is a great tutorial, thank you! Can you think of any way to make it so that you can remove the pole (or part of the pole) for storage? We wouldn’t want to leave these out all the time, just for big parties. Thanks!
I haven’t thought about that before. You could try cementing in a pipe that is slightly bigger than the pole in the bucket so you can slide the pole in or out when you’re ready to use it.
Hi, i was just wondering how wide and tall is your bucket? Thanks
It’s about 14 inches wide and tall.
Hi there. Where did you purchase your buckets 4 to 415? I have been looking high and low and can’t find them! Thank you!
I bought my buckets at the Home Depot.
I’m wondering if you could also bury the bucket, if you wanted it permanent? I don’t see why not, right?
I think it would be more stable to skip the bucket. Kinda like putting up a fence.
Love this! Can you post links to the items you used? Please and thank you!
I bought everything at home depot
Tried this and mine turned out great!