Tricks To Growing Great Tasting Broccoli
As an Amazon Associate and member of other affiliate programs, I earn from qualifying purchases.
Have you ever tried growing broccoli only to be disappointed by small heads, black rotted spots, yellow fruit and leaves, or worse…worms? Eww!
Isn’t it so disappointing?! I know, I’ve been there! Just like every garden failure, I learned from the experience, and I have figured out the tricks to growing great broccoli! Even though winter still claims this time of year, if you drive by my house, you will be greeted by the sweet delicate yellow flowers of my last broccoli plant.
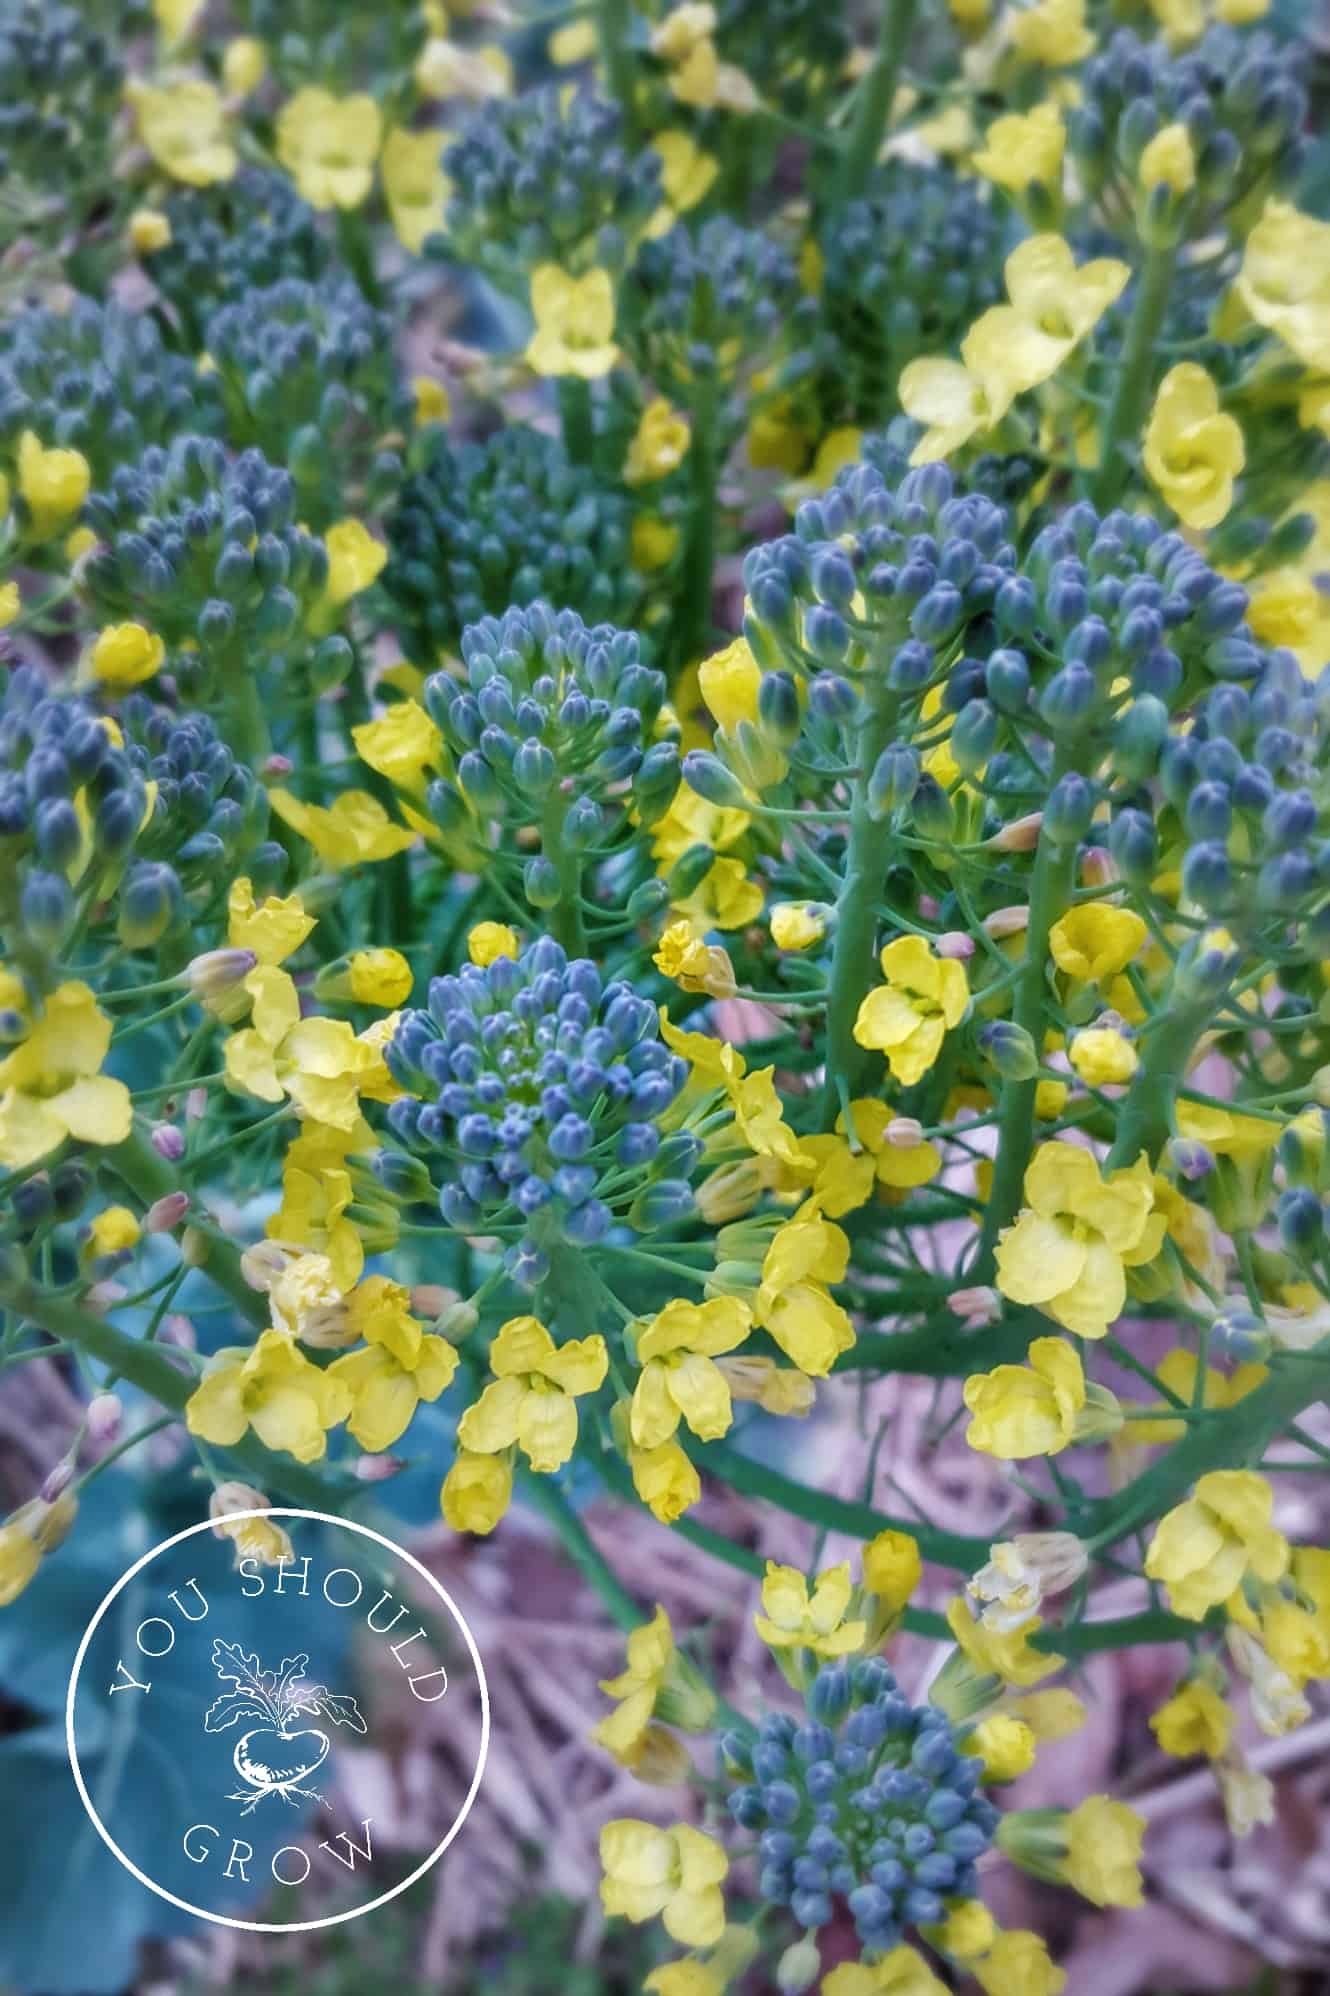
Broccoli is one of my favorite vegetables to eat from our home garden, so I’ve harvested most of the heads already. I love it when my personal chef (aka Hubz) browns broccoli heads in butter, salt, and pepper. The crispy brown edges are seriously to die for.
Did you know that vegetables like broccoli actually contain a fair amount of sugar in them? I wrote a whole post about getting sweeter produce from your crops like broccoli.
To make the best of that increased sugar content, roast or brown them in a skillet with butter or (gasp!) bacon fat. The sugar in the plant caramelizes in the heat and fat making those divine crispy bits I love so much!
So let’s go over how to grow broccoli.
Broccoli is very adaptable to growing at home. You can grow broccoli in the ground or raised beds. Growing broccoli in containers also works well, and you can follow these same tips for every method of gardening.
If you don’t have the space or the time for growing a full head of broccoli, consider growing microgreens right on your kitchen counter. Broccoli needs 6-8 hours of sunlight every day. It can be planted in the spring and the fall but, it does best in cooler weather.
It is important to set your broccoli out in your garden when it will have time to grow while the temperature is not too hot. When broccoli is grown in temperatures in the upper 70s F, it’s going to start bolting and turn bitter.
On the other hand, a mature broccoli plant can take a bit of frost and tolerates temps down to the mid 20s F. The plant will react to the cold by increasing the sugar content in its leaves and fruit which prevents the water in the plant from freezing in cold temps. Cool, huh?
The first trick to delicious homegrown broccoli is getting your timing right.
Plant broccoli so that it comes to age during a time of cold rather than heat. Every variety has a somewhat different time to harvest, but it can take up to 90 days until its ready.
That means if you’re like me and growing broccoli in Georgia, you’ve got to get your broccoli plants in the ground about February and October. In other areas, 2 weeks before your last frost and 4-6 weeks before the first frost are recommended.
That seems simple enough, right? It does not like heat and thrives in mild, cool weather.
But if it’s grown during periods of temperature extremes, i.e. when nights are cold and days are hot, it may produce miniature heads of broccoli called buttons. Ugh, it’s so picky!
Tip for growing big broccoli heads: Heavy mulching can protect your growing broccoli roots from temperature extremes, and, in warm climates, choose an area that gets some afternoon shade.
Growing broccoli from seed versus buying plants.
Although you can plant broccoli seed directly in your garden, it can be a slow starter. So in most cases, you’re better off starting your seeds indoors where you can control their environment and have them ready to plant at the right time.
Learn everything you need to know about starting seeds.
Start your broccoli seeds no less than 8 weeks before your desired planting date. Give them an ideal germination temp of 60-70 degrees F, and you should have sprouting broccoli within a week although it can take longer (up to 3 weeks!).
If you have them on a heat mat, move them off of it after they’ve sprouted, and give them plenty of light until they are ready to go outside. About a week before it’s time to plant, don’t forget to harden off your baby broccoli plants.
To accomplish this, set them out in the sunlight for an hour and increase the time every day for about a week. This helps prepare them transition from an indoor to an outdoor environment.
Alternatively, buy your broccoli plants from a local nursery. Look for plants that are at least 6 inches tall and have 2 to 4 sets of true leaves.
Planting broccoli in your vegetable garden
When you have your timing right, get your garden ready by adding fresh compost and working it into your garden soil. Dig a hole for your broccoli plants so that you can bury up to 2 inches of the stem. Heavily mulch around your broccoli plants with compost or straw to keep protect the roots from heat, retain moisture, and keep out weeds.
Growing broccoli in dense or compacted soil doesn’t work out very well, and it really needs its personal space. Broccoli plant spacing is one of the keys to getting good flavorful heads. If they’re too close together, they compete for water and nutrients. Plus they’re more prone to disease and pest problems. Space your broccoli plants at least 12 inches apart and keep the rows 2-3 feet apart. If the plants are too crowded, they won’t make big beautiful broccoli heads.
The second trick to growing great broccoli is to encourage a slow and steady growth rate.
Fertilize broccoli plants organic fertilizer once monthly and don’t let it get dry. A lack of water will cause tough inedible stems.
Install a soaker hose to keep water from puddling in the heads and leaves to decrease the chance of fungal infections and pest problems.
Pest problems for broccoli plants
Broccoli is less attractive to pests than other plants in your garden, but you can see all the usual suspects including aphids, cabbageworms, slugs, and flea beetles.
The best organic pest control for broccoli is to lay a floating row cover that allows light, air, and water to move through it but prevents pests from getting access to your plants. See this article for more information on row covers.
Alternatively, remove pests by hand and use an organic insecticidal soap as needed. Companion plants that may help deter pests and attract beneficial insects include marigolds, zinnias, parsley, and sweet alyssum.
Other broccoli problems
Yellowing leaves are often the first signal of a problem. Consider your fertilizing schedule as yellow leaves can be a signal that your plant needs nitrogen. Insects can also cause yellow spots by puncturing the leaves.
If the lower leaves of your broccoli plant are turning yellow and the heads of your broccoli are stunted and bitter, the problem may be a fungal infection called Fusarium wilt.
Foul smelling black spots on the leaves and stems also indicate a fungal infection.There is no treatment for these fungal diseases so destroy infected plants and avoid planting in the same location for the next two years.
Is your broccoli bolting?
If you’ve been watching a broccoli plant in your garden and you notice that the head starts to open up like in the photo below, that’s a pretty clear signal that your broccoli plant is starting to flower…aka bolting.
Unless you want to eat the flowers or save seed, it’s time to go ahead and harvest your broccoli for eating. Broccoli bolting is your signal that the plant is going into the flowering phase. You can certainly eat it after it’s started bolting, and it will still be delicious.
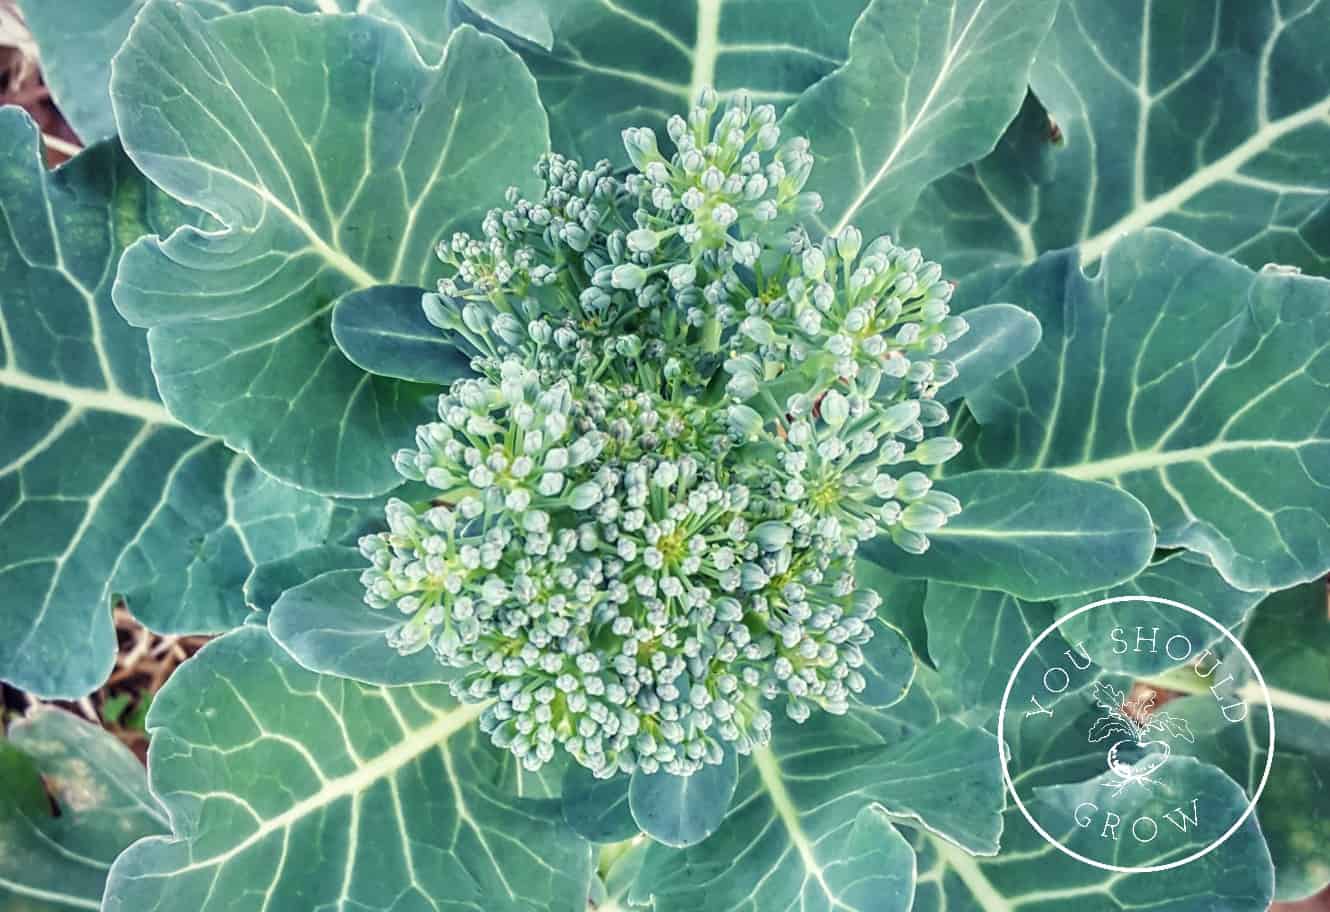
Watching your weather, try to let your broccoli grow through some cold snaps or even a frost. And definitely get it in the kitchen before the weather gets too warm. If nothing else, remember this about broccoli: heat and drought will make your broccoli turn bitter and tough.
The third trick to growing great broccoli is to harvest and eat it at the right time.
You can harvest your broccoli head at any time you want to eat it. There is nothing wrong with harvesting the baby sized broccoli heads if that’s how you prefer to eat them.
To harvest, cut under the broccoli head and take some of the stem but leave the plant in your garden. You may get a few more little heads sprouting off of the main stem. Or, if you like, you can wait and let it start to bolt so you can eat the flowers!
Broccoli flowers are delicate little yellow flowers, and they can be picked and eaten fresh in salads or cooked as you would the rest of the broccoli plant. But if you wait too long, and the flowers dry up, they won’t be very tasty at all.
This video about harvesting broccoli is great.
Saving seed from broccoli plants
It is not very obvious how to save seed from broccoli plants until someone points it out to you.
The broccoli flower is self-pollinating meaning it doesn’t need bees or other pollinators to visit it-contrary to what he implies in the video above. Once the broccoli flower falls off, it leaves behind the ovary that will grow into a little seed pod.
In order to collect seed from your broccoli plant, you’ll need to let it flower and then dry up. Once the flower stems have turned brown, you can harvest the seeds from within the little seed pods. But be warned, the seed is very, very small. So have something to catch it when you open the pods.
Here is a great video with more information about saving broccoli seeds.
Are you ready to start growing broccoli?
I know this is a long post, so just remember these rules to grow your own delicious broccoli at home.
- Get your timing right and plant your broccoli when your temperatures are above 25F and not higher than 75F, and try to protect it from temperature extremes.
- Give your broccoli an ideal growing environment with fertile soil and regular watering to encourage slow and steady growth. Mulch heavily to prevent weed competition and monitor your plants for pests and disease.
- Heat and lack of water will cause bitter, tough broccoli that is not good to eat.
- Harvest your broccoli and its pretty yellow flowers before the weather starts to warm up. The heat will make it taste bitter. If it’s already flowering and turning yellow-brown, it’s too late. Save that plant for seeds.


Thanks so much for this in depth post! I need all the help I can get in the garden and I’m enjoying looking through your posts and learning about different types of veggies I can (hopefully one day!) grow myself!
Hey, Annie! Thank you for visiting! I hope you get inspired and grow something sooner than later!
Thank You! I growed broccoli for the first time in 2016 and it’s February and they are still producing broccoli! Thanks for this information!
That’s awesome! You’re welcome, Jennifer! Thanks for stopping by my site!
Thank for the tips. I realized I’ve been planting too soon or too late, and can plan accoordingly. Also like tge tips on pest control.?
Thanks, Meg! I hope you have a better crop this year! 🙂
Hi!
I just subscribed to your site, and I can already tell it’s going to be a goldmine of information for this beginner gardener.
I’ve planted many things in my sixty+ years, some successful, some…well…may they Rest In Peace.
No more, “winging it” for me!
Having the information you offer here is going to turn this, sometimes successful gardener, into a mostly successful gardener!
Thanks a bushel and a peck! ?
Hi, Lori! It’s so nice to meet you! I am so happy to hear that the information will help you. 🙂
I’ve tried growing my own broccoli but those little cute white butterflies come in like a plague of locusts, turn immediately into caterpillars and eat everything in sight. Takes about 6 minutes. Anyone got any suggestions beyond Safer Soap that doesn’t involve a flame thrower?
PS unlike Pappa Bush I LOVE broccoli!
Yes! So annoying! Those white butterflies are actually the adults who lay eggs on the underside of the leaves of your plants which hatch into the crop-destroying green larvae. Inspect the bottoms of the leaves of your plants for their tiny yellow eggs. Also, try planting in the fall if you can since they show up in early summer and quiet down for the fall. Hope that helps!
Don’t forget to use those broccoli leaves too! 🙂
The broccoli leaves are also edible, especially if harvested before they’re like…18inches across! I slice them up, and toss them into a ‘green soup’, which is basically veggies steamed til soft, and then blended up in the water they were steamed in. Add butter and salt at the end. Don’t use just broccoli leaves though, just add a few in as ‘bonuses’. Use mainly broccoli heads and some cauliflower as well as an onion, & some garlic or leeks. If you don’t mind higher carbs, toss in some carrots.
Some people like to add in some milk or cream at the end to make it really nice.
Very true! You can absolutely harvest the younger leaves, more tender leaves for eating. Thanks for the tips! That sounds like a delicious recipe!
I’d like to plant brocolli on a container. Coud you tell me how to do if the temperature is around 32 degrees C and much raining as South Asia region please?
Unfortunately, 32 C is going to be way too hot for broccoli. Wait until the season changes and try it in cooler temps.
Your is a bagfull of knowledge last year i grew broocoli harvested but i am sure this fall i will be more successful thanx a lot
I build cages over my raised beds made with fiberglass screening and wood frames. No little green worms in my garden…no insecticide….lots compost…planted from seed on March 30 …it’s June 16 now…they are a good 24 inches tall and wide and starting center heads…I live in South Central Montana…zone 4b
Monarch butterfly caterpillars love broccoli. Be careful not to kill them. They are lime green with black and yellow stripes, and large, and quite striking. They feed in the fall.
I tried to grow broccoli once, but it didn’t ever do anything. I grow cabbage and kale here in my 6b garden, so I should be able to. You’ve inspired me to try again. Maybe next season!
Go for it!! 🙂
I am growing broccoli this fall in my raised bed here in the Dallas area. I showed seeds directly into the beds and they have done great so far. I started using straw mulch and the plants really seem to be like it. Can’t wait to eat some fresh broccoli from the garden!
That’s great! It’s so exciting to grow your own food, isn’t it?
I have started my broccoli indoors, and it gets very leggy and falls over… What am I doing wrong? (I live in Alberta, so we have a short growing season)
Seedlings usually get leggy because they are too hot, the light is too far away, or there is too much nitrogen in the soil. Are they turning brown/withering at the base and dying? That’s damping off, and it is due to a fungal infection. If the starting mix wasn’t sterile and/or it was too soggy, seedlings will get this fungal disease and flop over and die.
Thank you for the details. I bought seed and started to plant broccoli raab in my garden. Place where I live is quite humid, about 73 – 86 F, and have sunny day all year long. However, I am trying my best and hopefully it works well!
It’s always worth a shot. Good luck!
what do i do about leaves being eaten with holes maybe the size of my thumb. The flower was beautiful-now it seems beat up. Are there aphids or other leaf eaters attracted to broccoli? I’ve heard about soapy solution to kill these pests. What do you suggest?
It sounds like caterpillars. A treatment with Bt should fix the problem. Bt is a bacteria that will kill all kinds of caterpillars, and it’s used as an organic pesticide. You can probably find some locally wherever you buy garden products, but in case you don’t, here’s a link to a product I recommend on Amazon. https://amzn.to/2ui328J
Thank you for the tips. You’ve inspired me to try growing broccoli.
Yay! Mission accomplished. 🙂
What do you recommend to remove the worms from the broccoli head when harvesting? I have read about soaking in warm salt water or cold water with vinegar. Not interested in eating them! Thanks
Yeah, that would be gross! We have (miraculously) not had many problems with worms. When I have seen them, we just cut that section out and eat the rest.
I love growing broccoli and a lot of other veggies in the same family, throughout the winter. I do mostly grow under row covers here in zone 9. The broccoli takes the frost really well but then again it doesn’t go down past 25 degrees here. During this cooler time of year the broccoli tastes so much better than what you buy in the supermarkets. Your post has some very good info and it helped confirm that what I have been doing is correct. It has taken me a lot of trial and error.